AEW Fight Forever โฉมแรกของ Bryan Danielson ในอุตสาหกรรมเกม
Posted on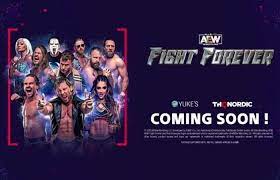
ตัวอย่างล่าสุดสำหรับเกมมวยปล้ำอาชีพที่กำลังจะมาถึง เกมออนไลน์ AEW Fight Forever นำเสนอภาพแรกของอดีต WWE star Bryan Danielson ในการต่อสู้ แม้ว่า AEW Fight Forever จะอยู่ห่างจากการเปิดตัวเพียงไม่กี่เดือน แต่รูปแบบการเล่นของนักมวยปล้ำยอดนิยมของ All Elite Wrestling หลายคนก็ยังไม่ได้จัดแสดง ตอนนี้เป็นเวลาที่ดีที่จะเปิดตัว Bryan Danielson การยืนยันล่าสุดสำหรับบัญชีรายชื่อ AEW Fight Forever จะท้าชิงแชมป์ AEW World Championship ที่งาน Revolution PPV ที่กำลังจะมีขึ้น Bryan Danielson เป็นหนึ่งในสมาชิกเพิ่มเติมที่น่าตื่นเต้นที่สุดในบัญชีรายชื่อของ AEW นับตั้งแต่ผู้เข้าแข่งขัน WWE เริ่มการแสดงในปี 2019 Danielson เปิดตัวอย่างงดงามในงาน All Out 2021 ของ AEW โดยท้าทาย Kenny Omega แชมป์ […]